


For a couple of years now I have had several ideas for whimsical Christmas trees. I went with my friend Margaret, visiting me from NY, to Homegoods. They had some really interesting trees and I left there inspired.

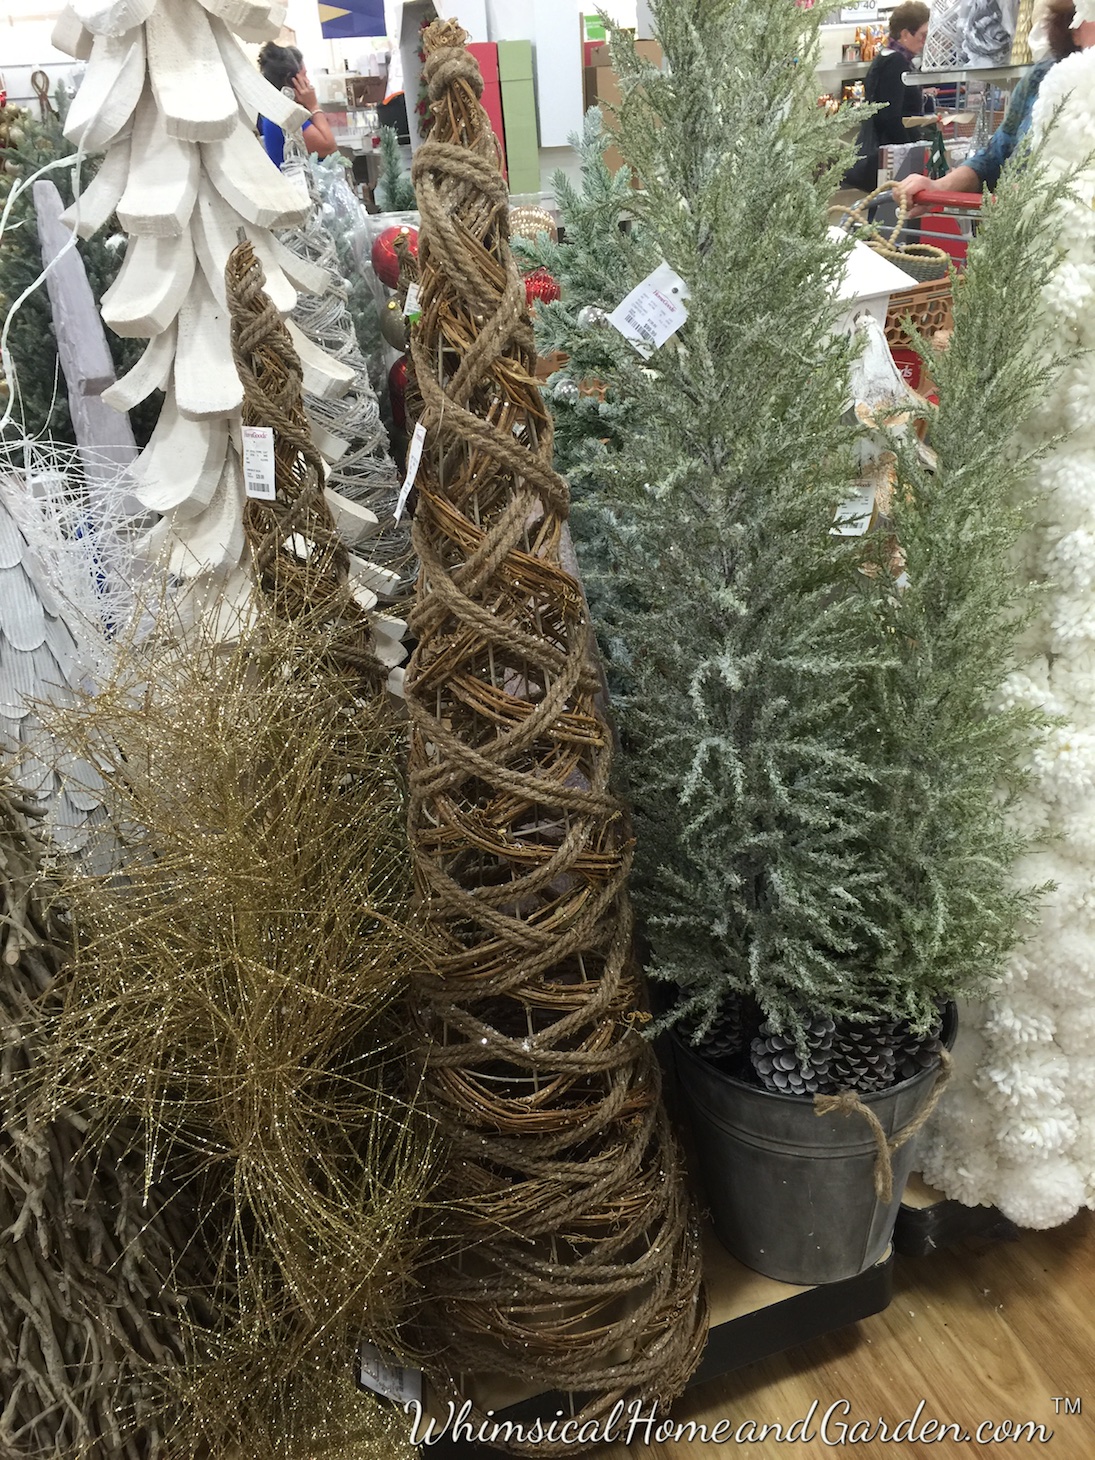
Most of their trees were at least 4 ft. I adored the texture and the organic nature.
I could have taken home several of them.

I really, really wanted to take this one home. I have a trio of tall metal Santas that would look cute nestled in a trio of them. It had the softest texture. Anyway, I left it in the store.

I could have had fun decorating with any of these trees.

the one in the forefront was bark with faux fur, and it has clear glitter on it. The wood one in the back was interesting, and they had it in a lot of sizes.

This is what I really wanted! It had just come in, and I am here to tell you that if it had fit into my van, it would have gone home with me that day. It is made to be decked out in greenery, a Santa, maybe a tree on the top bench.
Finally, after the visit to Homegoods I decided to draw plans and make one of the trees I had been thinking about. I already have several trees of various sizes, so a tree that takes up floor space is out. Of course, what appears to be simple, fast and easy at the start never is. I sketched my plan, and then drew actual dimensions based on what materials were easily available, and would fit where I was going to place it. Foremost, it had to be inexpensive to make, yet look nice, and also be fairly easy to craft. KBJ gathered my materials from the dowel department at the local box store and then my idea for my flat tree begins to come to life. Starting with a 1″sq x48″long flat poplar dowel, I laid out the spacing of the 1/2″ round dowel “branches” on the floor to see if I liked the proportions I had sketched out. With a bit of twerking, I did.
Next the holes in the square dowel had to be drilled. For this, a drill press and a good clamp is going to give you the best results. After measuring and marking the dowel, KBJ did the drilling for me, using a 1/2 drill bit, which was the size of the dowels.

Lining up the post with the drill press bit before clamping it down.

For this project it is important that the holes be dead center. Here KBJ is lining it up with the marks I made after measuring.

The deed is done. Notice the rust on the shaft of the drill press? I take full responsibility for it here and on a bunch of drill bits. I had a can of muriatic acid that developed a leak, and the darn vapors rusted a bunch of tools. I haven’t gotten around to cleaning this one yet.
Unfortunately, the hole was too tight to allow the dowel to pass readily through the hole, not entirely unexpected. However, the problem is the next drill size, even a mere 1/16″ more would leave the dowels wobbly in the hole. AND, there are no drill bits readily available in the sizes needed. So, what to do. First KBJ used a T-handle reamer to enlarge the holes a bit. Then I sanded. Using my small electric sander with semi-coarse paper, I rolled the dowel while I sanded up and down the length until the dowel finally went in snug. Unfortunately, by spray painting it, the dowels will probably not be removable, which was my original idea, so that it could be stored in a space of a few inches. That being said the new permanent version can be stored in the back of a storage area as well. For this reason, my final version ended up being 4 ft high, and 32″ at the bottom branch. I had originally planned on 7 branches, but decided on 6 after I put it together, for a more balanced look.

So this is what I ended up with. OK, it doesn’t look like much now, but have some faith. KBJ said it looked like an antenna. First it needs some paint.

It was a pretty day, and once the temperature got to the mid 50’s, I took it outside and spray painted it with a white semigloss with built in primer. When I finished, the leaves looked like they had hoarfrost. It was done in a few minutes. I took it inside to dry overnight.
And this is what I did with it……….

It now hangs in the front window of my dining room.

For this year I chose to use green, red and gold ornaments, but you can have a lot of fun changing it out every year.
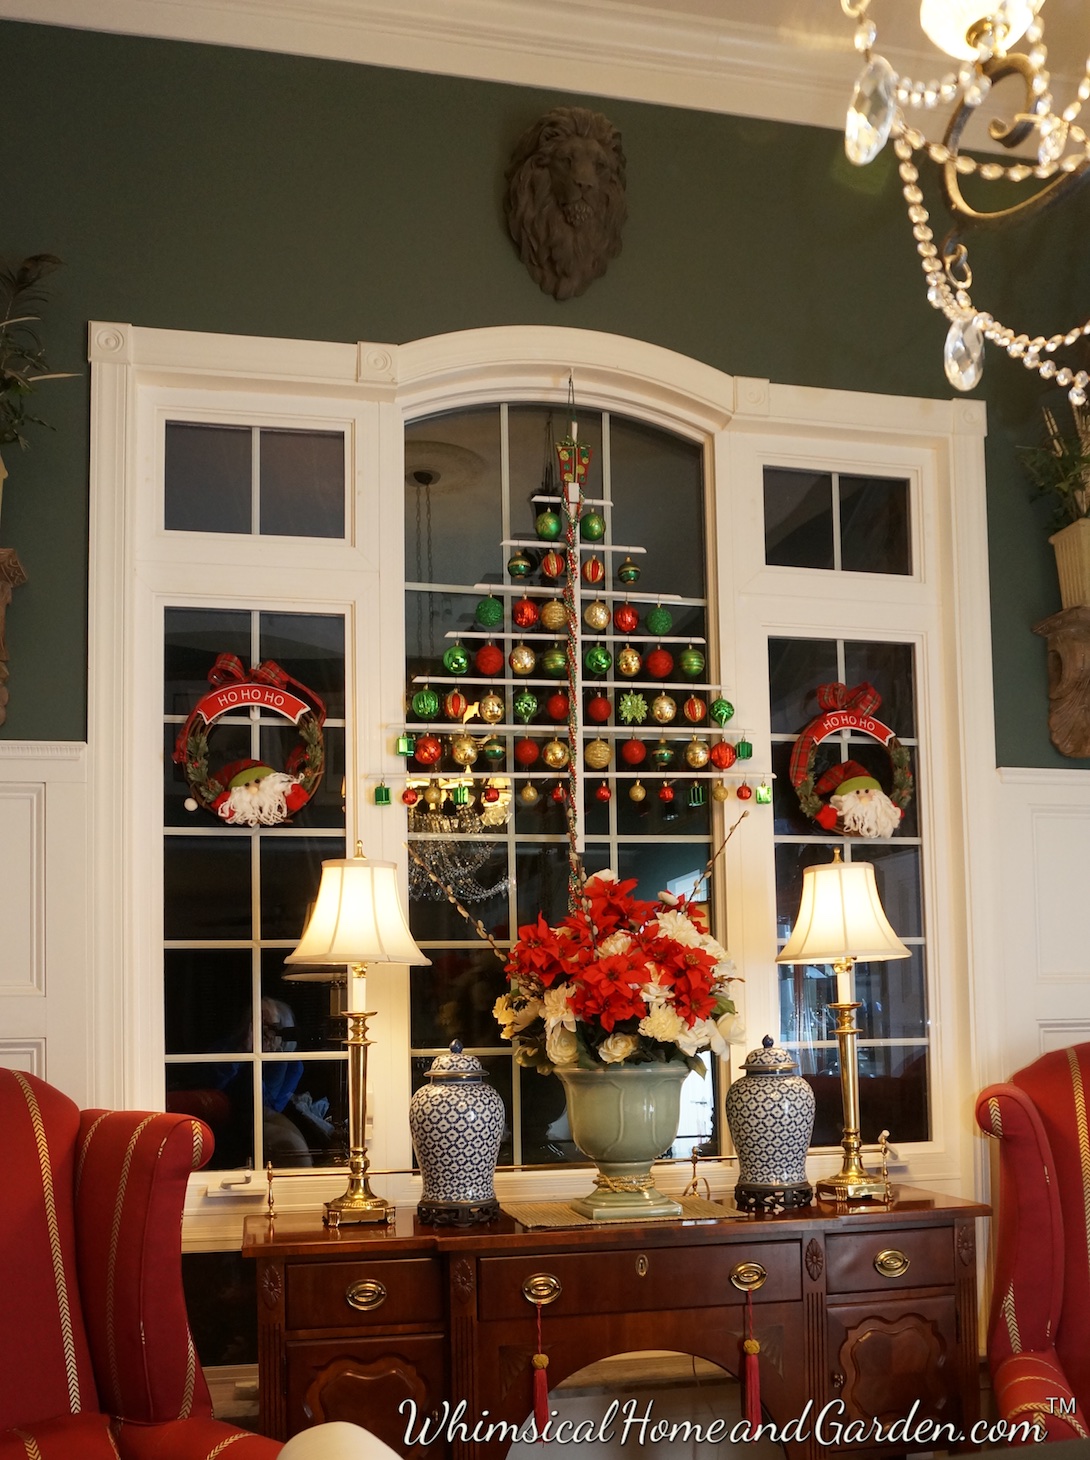
This is not the final decor for this room. I just wanted to show you a few photos of the finished flat christmas tree. You could hang a tree like this suspended from a ceiling, make a couple and use them on a wall and more. I will share more photos as I decorate for the holidays.

It is difficult to believe that it is already December. It has gotten more seasonable the last couple of days, and I am now looking forward to the holidays.
Tomorrow I will start with getting the trees set up, and really get a move on with decorating. I so look forward to evenings when all the tree and mantle lights get turned on, and sweet memories flow. Thanks for stopping by. laters, charisse


Just sweet!
Thanks Margaret.
Charisse, you never cease to amaze me! Like KBJ I thought antenna. I knew you were going somewhere with this but I wasn’t quite sure where. Remember the bowling balls?! Not surprisingly your flat tree turned out absolutely wonderful!! Perfect where you displayed it.
Good job my friend!!
Thanks Susan. Before I decorated it, KBJ also said it looked like the antennas trackers use deep in the jungle to track wild animals. I get no respect! But at least he helps.
Love it!
Thanks Laurie.