

So we made a decision after carefully researching and studying our options. I will try and explain the rationale as to why we made the decision we did. We chose grade 1 treated pine again. Believe me when I say that it was not an easy choice, but then again, it became an easy choice after sitting on it for a bit and doing some more research. We originally wanted to go with Trex or ipe wood. We had a company come out that specialized in decks and used Trex exclusively. I really struggled with how it lacked the appearance I was looking for. Remember, I live in the woods, so I preferred the material to relate to a more natural esthetic, although I have to admit, the reason we were considering it was I wanted lower maintenance. The company owner came, showed us samples, took measurements, and said he would get back to us with an estimate. He did and it was way more than expected, or should have been….like close to $18,000! Reading reviews, I determined that for all the extra money, it was not going to work anyway, especially because delaminating was an issue. There are links at the bottom of this post that were a part of what went into my thought process. I contacted 3 more contractors, two of which specialized in decks. One never showed, one came and never sent the estimate, and the third came on a recommendation, and ended up doing the work for what I pretty much estimated would be the cost. This is not a complicated job as decks go, pretty straight forward. The ipe would have been twice as much, lasted almost forever, but left naturally, the gorgeous dark beginning color weathers to a silver gray unless you stain and maintain, although I have since learned that a simple application of UV protector will retain the original color. Installation cost of ipe is also a bit more because it is an “ironwood” from the tropics and it goes through drill bits like crazy.

They started removing the old decking in the bay area, having already removed the top rails and stacked post caps.

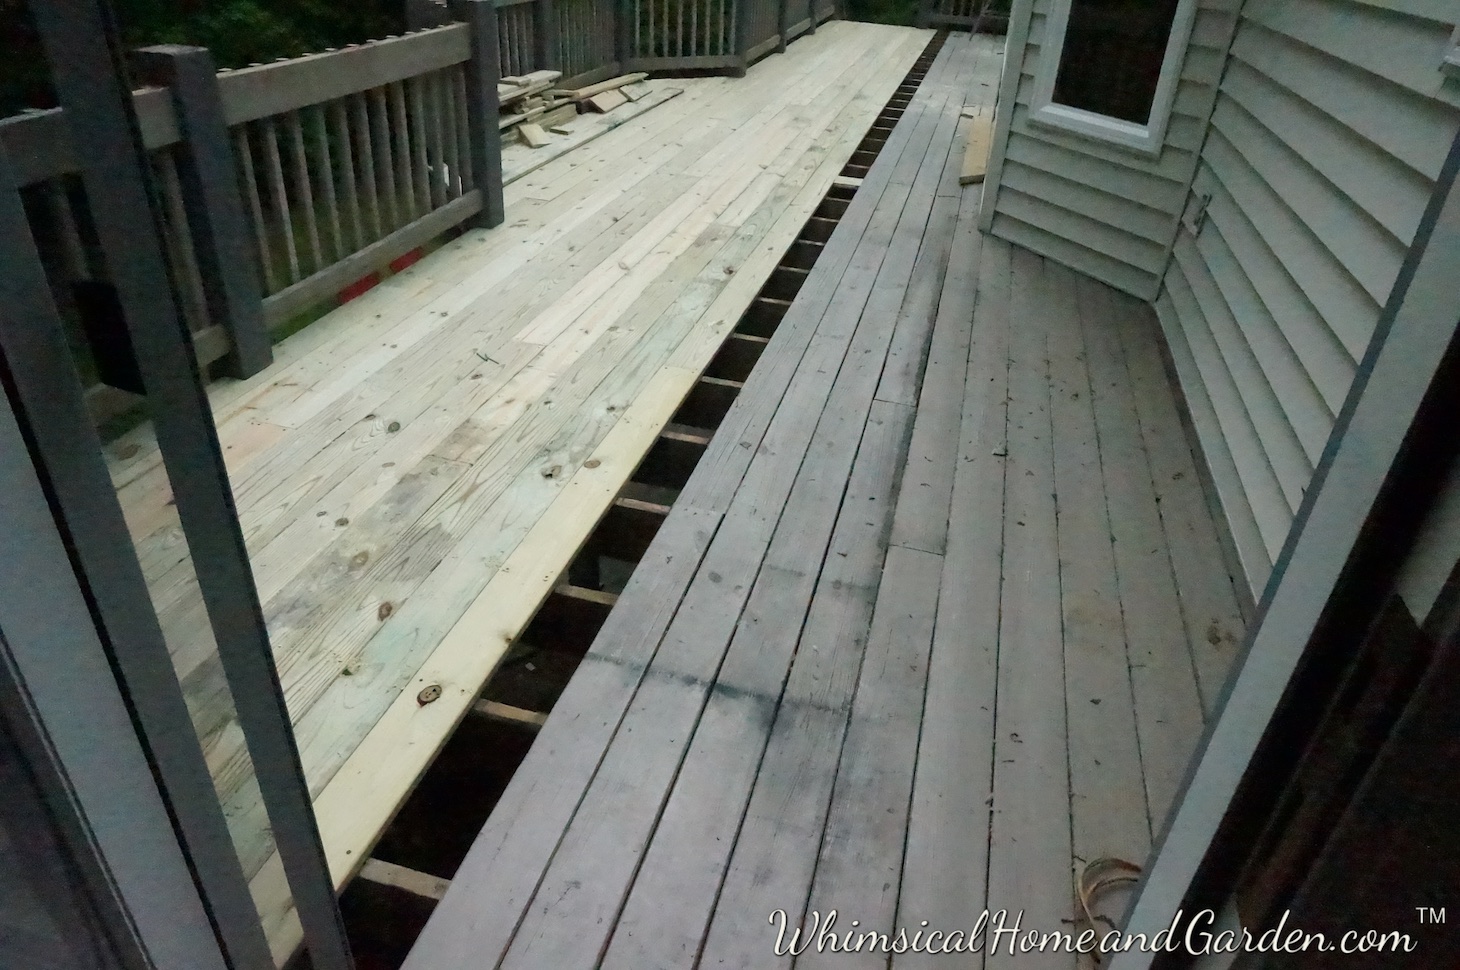
Here they already have replaced a few boards. They removed a few at a time, so there was always a safe place to walk. We decided on countersunk screws inserted on the top of the boards. Each hole would then have a wood plug inserted to cover the screws and fill the hole. It is already looking better.
We were fairly lucky once the work started. We had had weeks of solid rain this spring that prevented them from starting. When the sun came out, it remained very warm and dry. In fact we had little rain all summer. The lumber arrived fairly dry as well. The reason we decided on top screwing in rather than from the side is, if you ever have to remove a board, which we did several times on the old deck, removing and replacing becomes a bit more complicated. You cannot remove just the one board, you have to remove more to get to the one board. This is especially true if you use fasteners. Also, we found that tree leaves and stems, which tend to often get stuck in the side seams, do even more so with fasteners.
This was another days worth of work. It goes slower than you think. There were two people working.

After another day the deck is moving along.

This photo is looking in the opposite direction from photo above. This french door leads into the breakfast area. The doors are a full 8ft tall and maintenance free, thankfully.

After the top level was done, there was still the stairs, the risers, and stair railings to do.
So after the deck was done, we had to wait for the wood to dry out. It is best to wait until the moisture level is less than 20%. The dryer the better. We used a moisture meter to check it after several months, and although large parts were ready for stain, some areas were not. We were having another record breaking hot summer and hardly any rain, so we waited until October when the moisture meter finally said “GO!”, and it was cool enough to apply stain. We were getting readings consistently at 10%, at most a few at 15%. We were in a window of tolerably warm weather (must be applied under 90 degrees), and the leaves were not coming off the trees such that they would make a good stain job more difficult. I had used the time during the summer to do a lot of reading about stains in professional forums, and phone calls to technical support. Here is how I went about making my choice of stain color, type of stain, and brand. These are strictly my own observations, opinions, etc. There is no sponsorship at all.

I wasn’t sure about what colors I would use this time, but I wanted something away from the gray. Keep in mind, the darker the stain, the more UV protection you have from the wood degrading. This is what the wood looked like when it got wet, and I was liking the contrast. As the summer moved along, it got a bit deeper than this, and I was sure I was going to go for a contrasting color….no more gray.
I was originally going to go with Cabot stain, as my experience had been good with it years ago in another house that had cedar siding. It held up extremely well. They had a new product out, yet none of their paint stores or dealers carried it! So I called them direct, and no they could not ship, and no they had no samples. I was not going to go ahead without knowing what the stain looked like on my deck wood. The oil stain brand that I had originally used on the deck that did quite well, but was no longer available. I used Consumer reports to read stain reviews, and many other reviews, including on Amazon. Yes, they sell stains. The problem with many reviews is that they only review things relevant to the immediate. Most do not come back in several years to say how the stain is still working. I eventually found this site called deck product reviews, and they rate stains, then update over the years. I also found professional painters reviews, and decided on TWP. It is an oil based stain, can be shipped and is legal in my part of Virginia. They had samples for a nominal cost, and that cost is then deducted against the purchase of the stain. They also have VOC compliant stains for those states that prohibit the full oil. They were prompt in sending out the 4 stain samples. I made a sample board out of leftover deck boards and the choice came down to two. I finally picked Pecan, less yellow than the “wet” look above. I called the company to order, and even though our deck was new wood, aged 6 months, to prepare it to “take” the stain, it still had to be cleaned and conditioned in order for the stain to soak into the wood and therefore maximize the protection. Ugh. More work. So I ordered the stain, cleaner and conditioner. I learned that it was not just a sales pitch. Preparing the deck for a finish is the most important step.

This is what was sent to ready the deck. It is eco- friendly, meaning the gardens below the deck would not be harmed. We watered the shrubs down before starting as a precaution. The deck has weathered for 6 months, and after cleaning with part 1, I was surprised at how much dirt it removed. KBJ and I both went “WOW” after cleaning the first section. It became much lighter and cleaner. The one thing that the cleaner does as well as clean, is remove the burnish that results from milling the lumber from rough cut to finished lumber. Very important in order for the stain to penetrate, and not sit on the surface. Part 2 restores the ph and really does brighten as well.

We ordered a 5 gallon can knowing we would have some left over. It was more economical and practical. Shipping was free, and it came in just a few days via UPS. This stain is also the only EPA stain certified as a wood preservative.

We started at the far end in front of the master bedroom, and worked back towards the breakfast area. We tried a pad, but it dripped too much. We decided china bristle brushes, perfect for oil stains and paints. These are a bit more expensive, but I have had mine for years. They hold the stain, which has the consistency of water, without dripping, and prevent bubbles. The key is to brush the stain on, wait 10 to 15 minutes, and remove any extra not absorbed. If you leave pools of stain on the surface, it will dry shiny and slippery. With new wood, put on only one coat! Although it isn’t on the can, new wood is only one coat. End any stain effort on the end of a board to avoid lap marks. All in all, it took two days to stain. We placed plastic sheeting below to catch any drip (there were few) and using the brush also allowed us to reach over the board edges to get stain in there.

Here it is all stained, but not finished. Not finished??? What???

Remember those screw holes? Yup, all 1200 plus of them?

A truly thankless job. Keith helped me with some of the first 600. We did not have enough, so had to order 1000 more. We went ahead and stained the deck with the first bunch placed. I then soaked the newer ones in stain, let them dry and finished pounding them in one by one. Was it worth it? Absolutely. They look like finished floors, so much better than visible screws or nails. They went in fairly easy with the use of a rubber hammer and sometimes a wood dowel to help send them home and flat to the surface. I just focused on getting done, say four more boards. That done, four more, etc., and in a few hours, the two of us got it done.

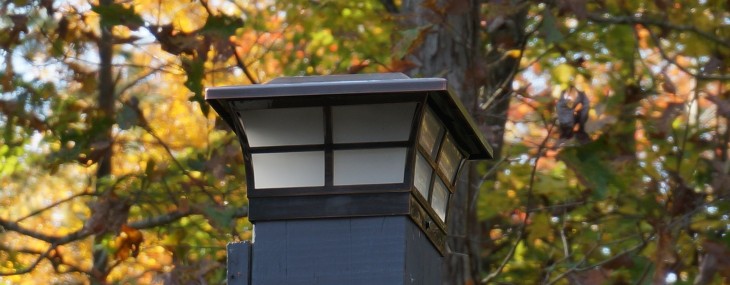
The post tops had rotted for the most part. The two tall ones in the bay were replaced with copper solar lights.

Keith unscrewed them and put up the new copper lights.

Here they are installed. It took all of 5 minutes to do it all.

Lastly, the remaining post caps. I have had cedar post caps, fancy and plain, and then the ones that I made that you saw in the part 1 post. I wanted caps that would not deteriorate in a couple of years. At $13 to $20 a pop, and needing 18 of them, I wanted something that would last, and no maintenance. I came across Atlanta Post Caps. Again, I paid for these; this is not a sponsored post. I just want to share a good discovery. First, they are made in America. Second, they have free shipping on most orders. Their customer service was excellent and they shipped and arrived quickly. Best of all, they were easy-peasy to install, forgiving of todays not totally accurate lumber dimensions. I can’t say enough about how easy they were to put on. I did them all in a matter of a couple of minutes each. I will post a video along with the other links. They come in various colors, are a heavy resin and guaranteed for 10 years – yeah!

We finally had some rain yesterday, and it definitely beaded up.

Here it is all finished. We just made it under the wire with the changing weather.
I have already enjoyed a few cups of tea out here. It remains to be seen now how well the deck holds up over the winter. We have had so little rain, and that allowed the stain to really cure, and to do so without any foot traffic. In the spring there will be a cabana or pergola at the far end, and some other additions, including, I hope, some additional all weather wicker furniture. I think the color of the wicker rocker really lends itself to the new look. I will also put down some outdoor rugs, and some additional lighting, as well as some flower pots and hanging baskets. Will share all that come spring time. All in all, I think this deck is a vast improvement from the previous. The original lasted a good 12 years in good shape, then another couple until enough was enough. Links below for additional info. Thanks for stopping by. laters, charisse
Summary: *preparation is about the most important thing you can do to insure good and lasting protection. Some body reviews about paint and stain failures I am convinced were because they did not do the absolutely necessary steps to prepare the deck for new stain or paint.
* screws vs nails….screws win. Use the correct ones, coated to vastly increase corrosion protection vs galvanized.
* get several estimates and specify every single expectation so there are no misunderstandings. Our installer came to us on a recommendation, he did the job as promised and we ended up having him do a couple other projects we couldn’t handle by ourselves because of time.
*stain…..latex vs oil. For me, oil.
* use a moisture meter on your boards to determine when they are dry enough.
*do your homework. It will pay off in the long run. The internet can be full of misinformation, so search multiple forums and informational sites.
https://www.atlantapostcaps.com
http://www.consumerreports.org/cro/decking/buying-guide.htm
https://www.consumeraffairs.com/homeowners/trex_composite_decking.html?page=2


its so beautiful
Thanks, and glad you stopped by. Happy autumn Sunday. charisse
Great article! Beautiful job! Would you mind sharing your source for the solar lights? Thanks!
I got them from Atlanta Post Caps where I got the others. These are for 6×6 nominal sized posts. I like them because there is a switch inside so you can turn off the lights. Our bedroom is a wall of glass and I don’t sleep well with any lights. When we tried them with the lights on they were very lovely, more decorative that illuminative. below is link. https://www.atlantapostcaps.com/solar-post-caps/
The deck looks fabulous! Lots of hard work and money but well worth it.
Thanks Susan. I am so glad that the task is behind me. We weren’t able to use the deck all summer, and really didn’t want to until it was redone. Now I go out and sit in the rocker a bit with a cup of hot tea and the sun in my face. Feels lovely.
Your research really paid off. I’m so glad your blog is back up and running. I have missed it. It has become part of my morning routine. Have coffee read blog.
Thank you Carole. I missed blogging so I am happy to be back. Enjoy your morning coffee and so happy to be a part of it.